User guide

MeetingSlot user guide

For organizers and participants — everything you need to know, no technical background required.

Contents

What is MeetingSlot

MeetingSlot is a web app for scheduling meetings — you (the organizer) create a meeting page, pick the days, and open time slots for people to choose. Then you send a link and let participants pick the times they are free. Participants don't need to sign up, and nobody has to share a calendar.

There are 2 modes to choose from when creating a meeting:

ModeWhat it doesBest for
Regular mode — find a common timeParticipants tick every slot they are free (no limit). The system shows which slots got the most votes, and the organizer confirms the single time that works for everyone.Team meetings · Client meetings · Cross-team coordination
Limited-capacity mode — book by slotSet how many people each time slot accepts. The system closes a slot automatically when it is full. The organizer can confirm multiple rounds at once.Job interviews · Mini workshops · Service appointments
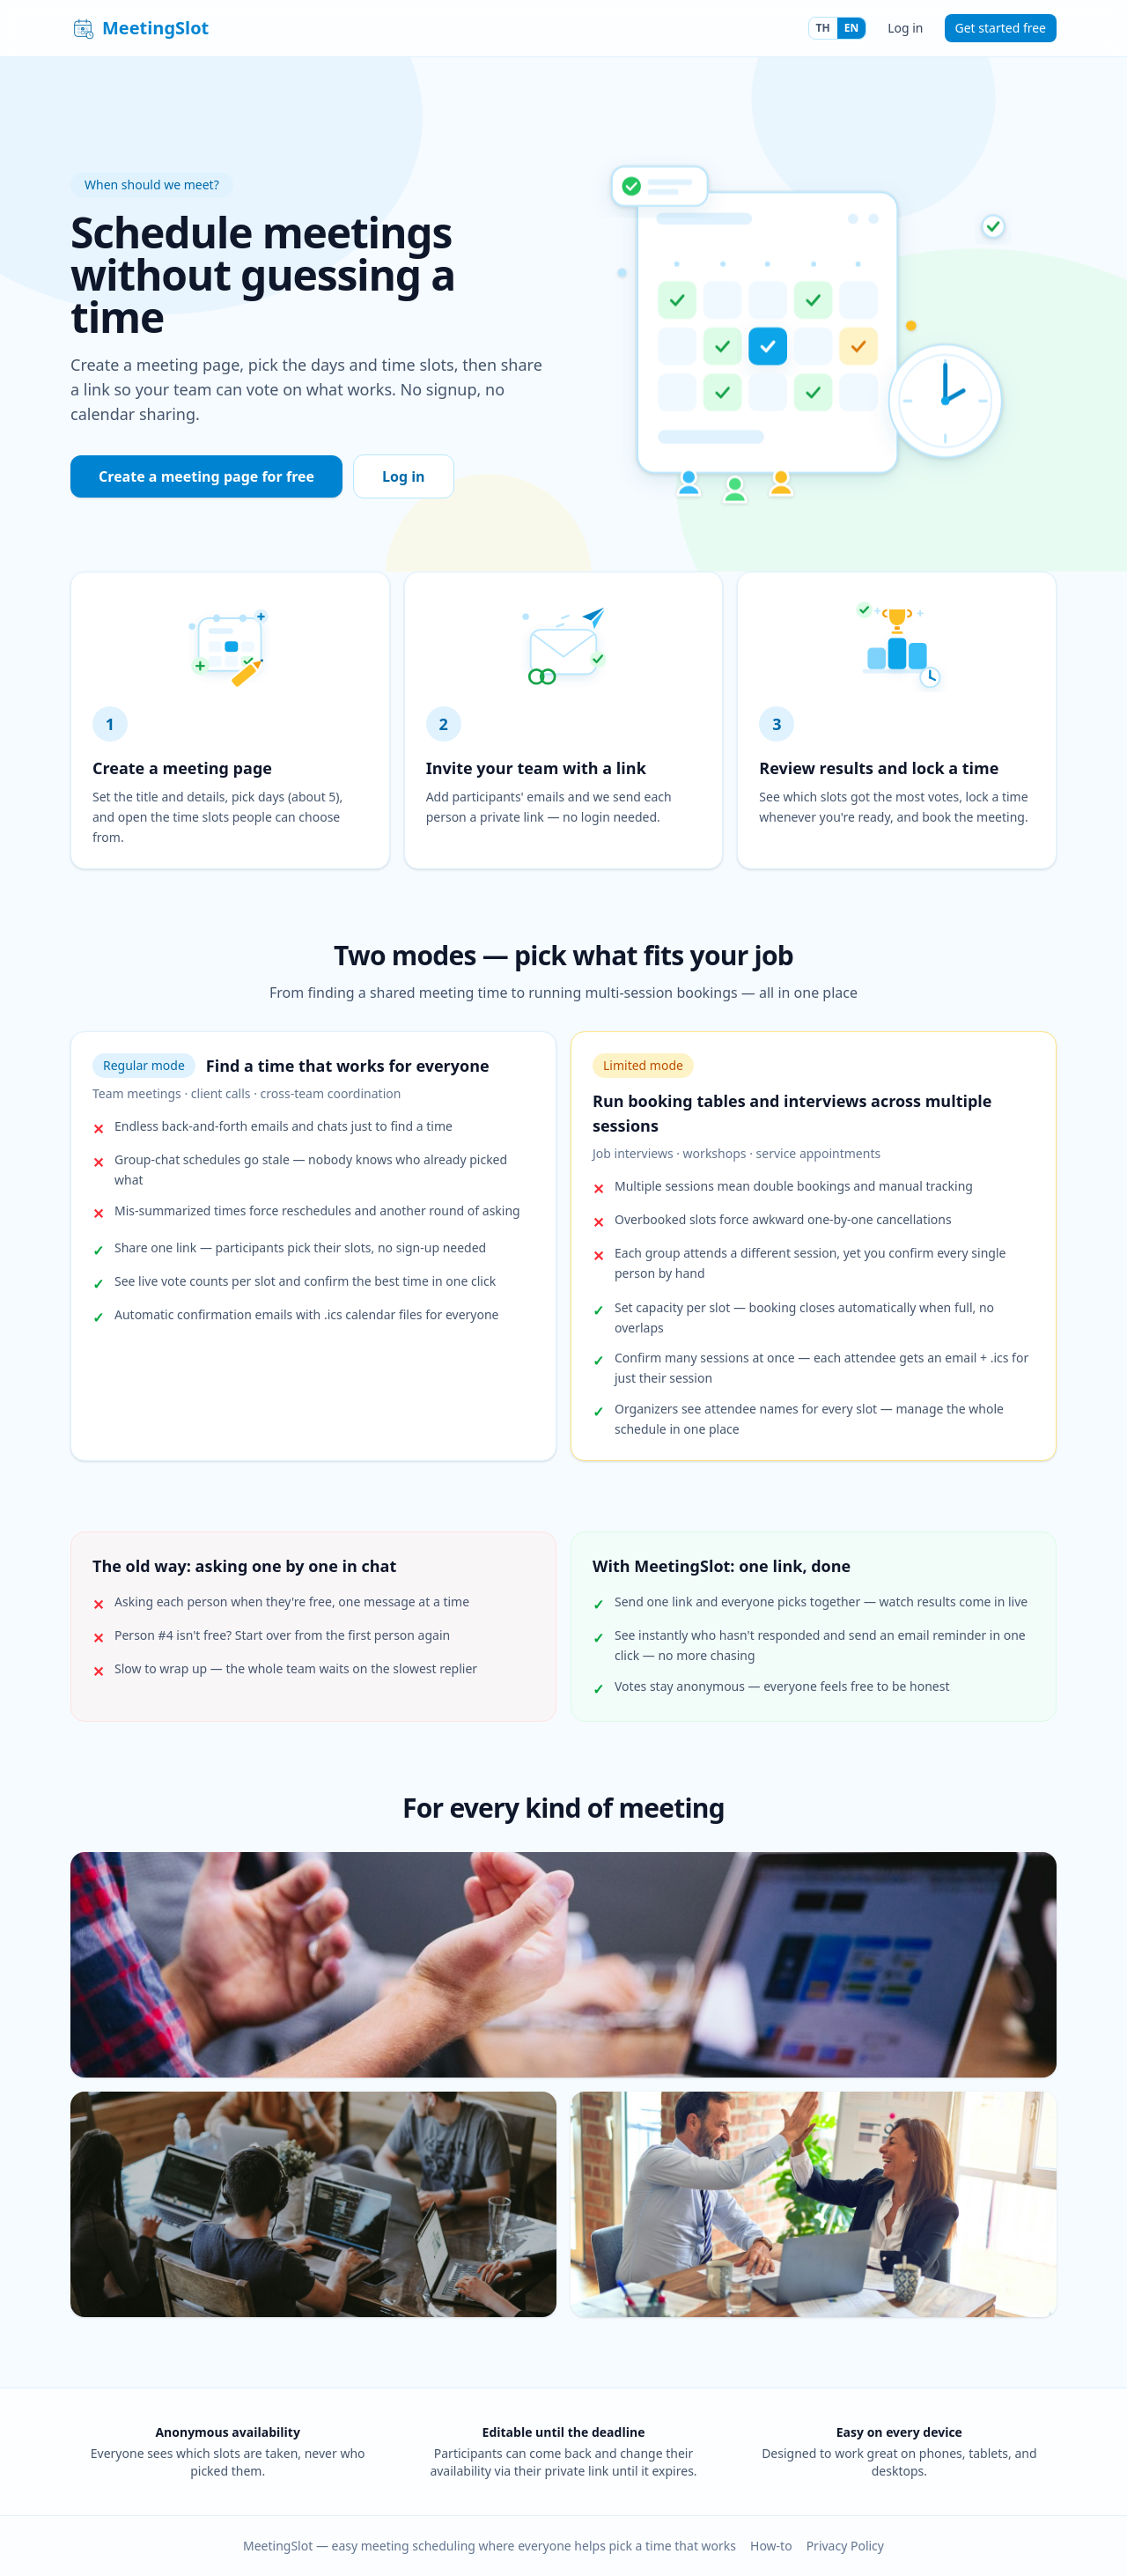
MeetingSlot home page

Get started in 5 minutes

Here is the whole flow at a glance (details in the sections below):

  1. Sign up → click the verification link in the email → fill in your organization details (required step)
  2. Click Create a new meeting, set the title, days, and time slots in the 4-step wizard
  3. Invite participants by entering their emails and names — the system sends each person a personal link
  4. Participants open the link, tick the times they are free, and hit save (no sign-up needed)
  5. You review the votes and confirm the time → the meeting is locked automatically, and everyone receives a confirmation email with a calendar file (.ics)

Sign up and verify your account

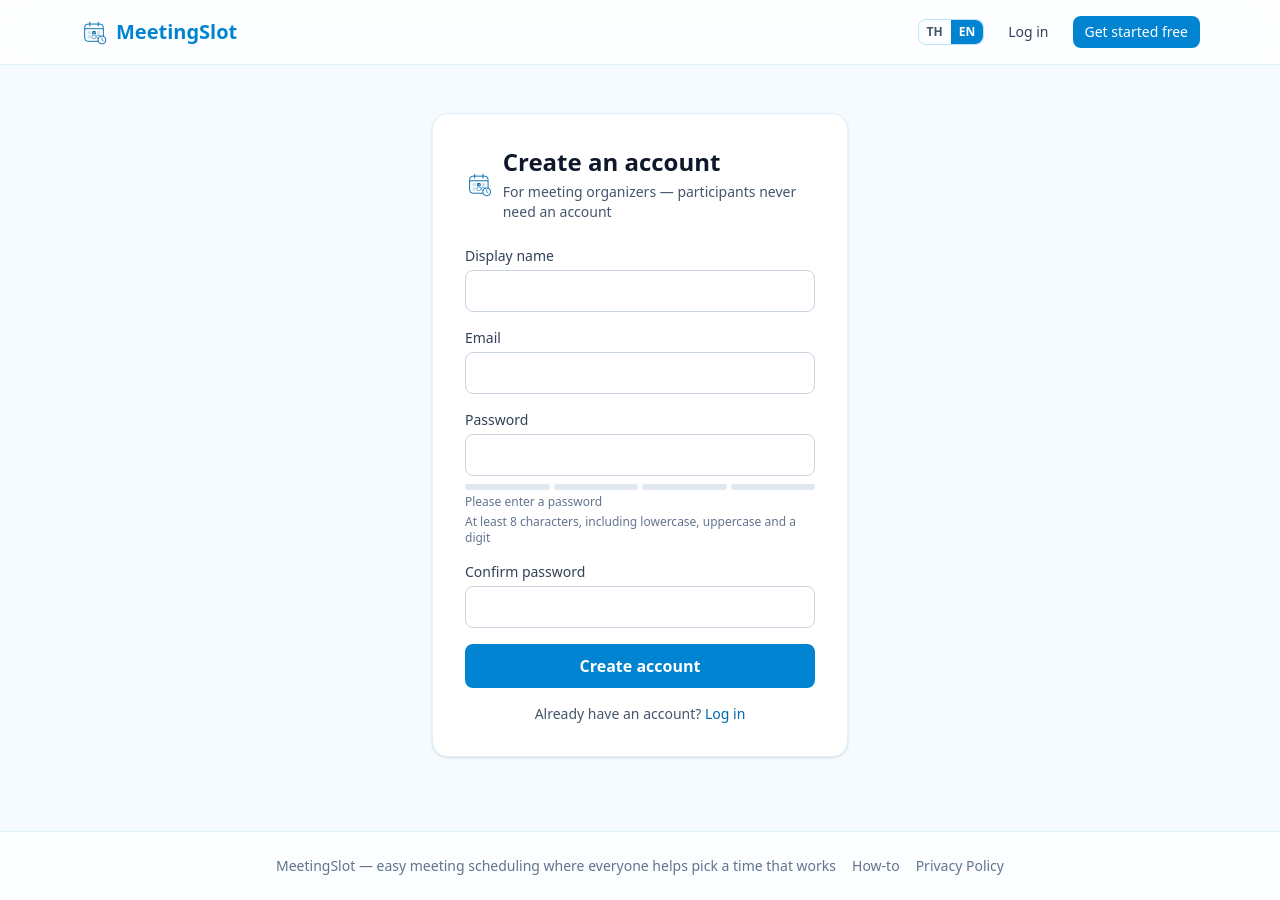
Sign-up steps:

  1. Click Get started free in the top-right corner, or Create a meeting page for free on the home page
  2. Fill in your display name, email, password, and password confirmation
    • Passwords need at least 8 characters, including lowercase letters, uppercase letters, and numbers
  3. Click Create account
  4. Open your email and click the verification link within 24 hours
  5. Log in — the system takes you to the organization details page, the last step before you can start
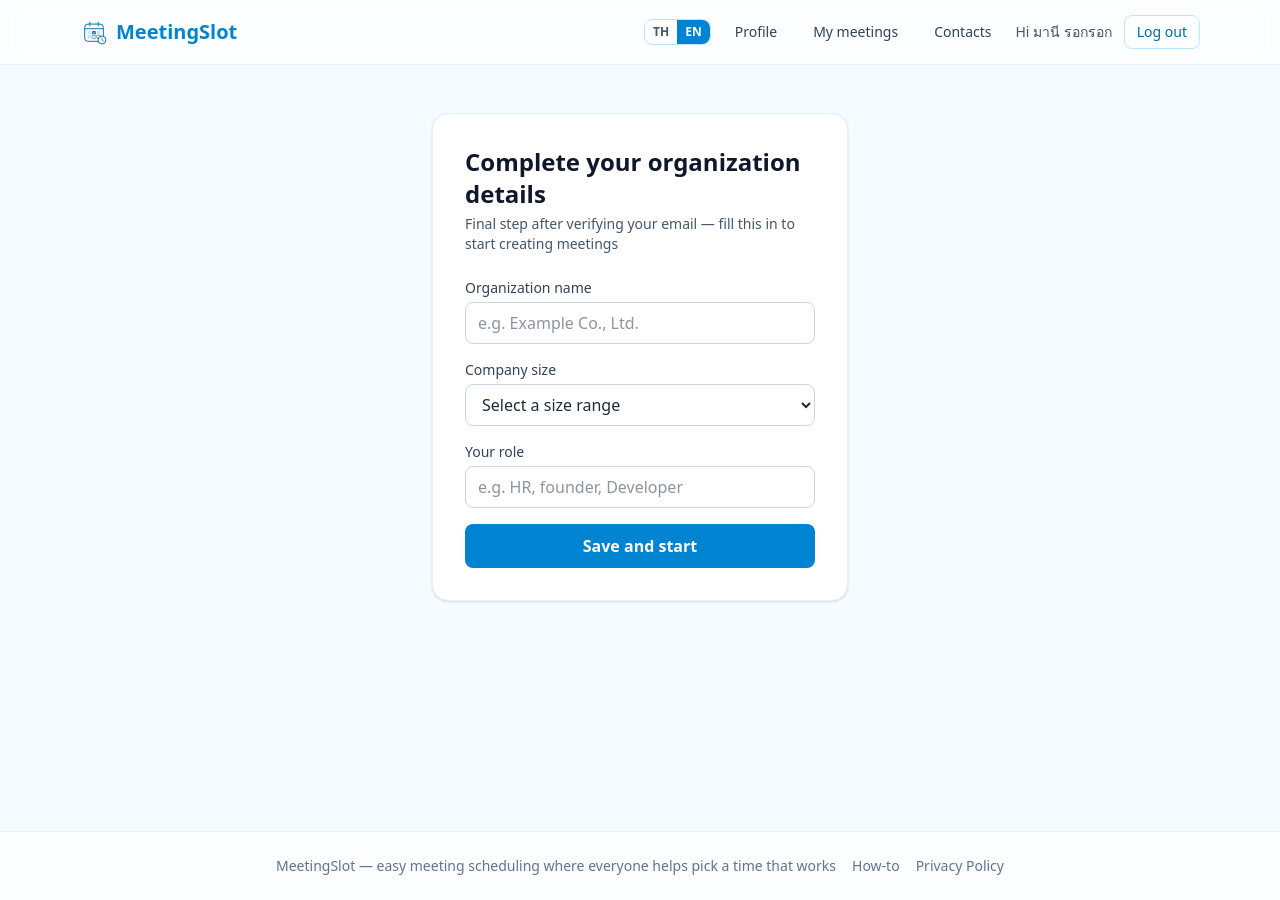
  6. Fill in your organization name, organization size (1-10 / 11-50 / 51-200 / 201-1000 / 1000+ people), and your role in the company, then click Save and start
Sign-up page
Organization details

Why all these steps? The system requires email verification and organization details before you can create meetings. If something is missing, you will see the message "Please complete your organization details first" along with a button to go to that page.

Didn't get the verification email? Try logging in — if your email is not verified yet, the system shows a notice with a Send the verification link again button. Click it and wait for the new email. Don't forget to check your spam folder.

Logging in / Google

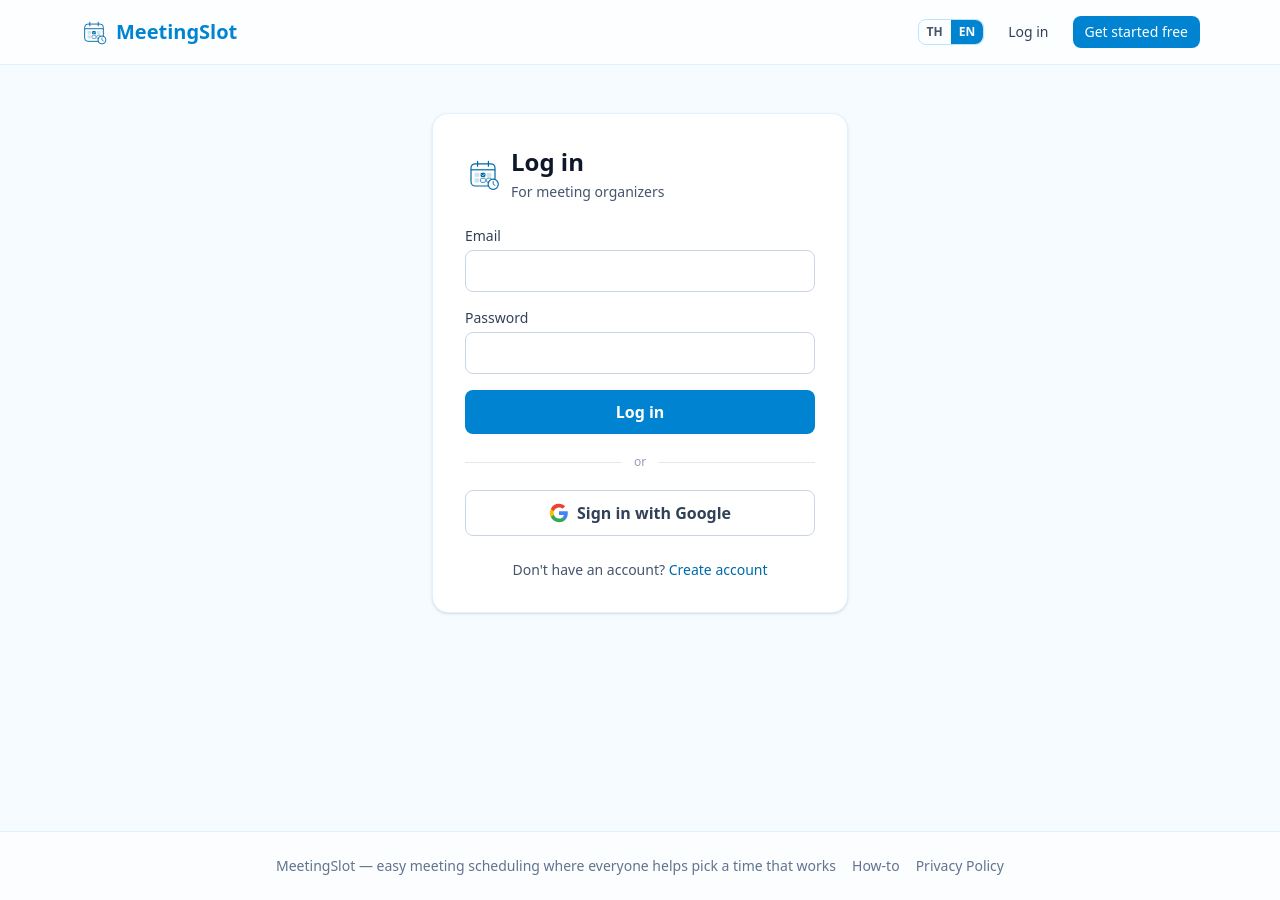
  • Log in with the email + password you signed up with
  • Or click Sign in with Google — a Google account counts as verified right away, but you still need to fill in the one-page organization details before using the app
  • Google users don't have a password to change (the profile page shows that you are signed in with Google)
Login page

Creating a meeting, step by step

From the My meetings page, click Create a new meeting and follow the 4-step wizard. You can click any step at the top (the stepper) to go back at any time — moving forward is done only with the Next button.

Note: Inviting participants happens on the management page after the meeting is created — it is not part of the wizard.

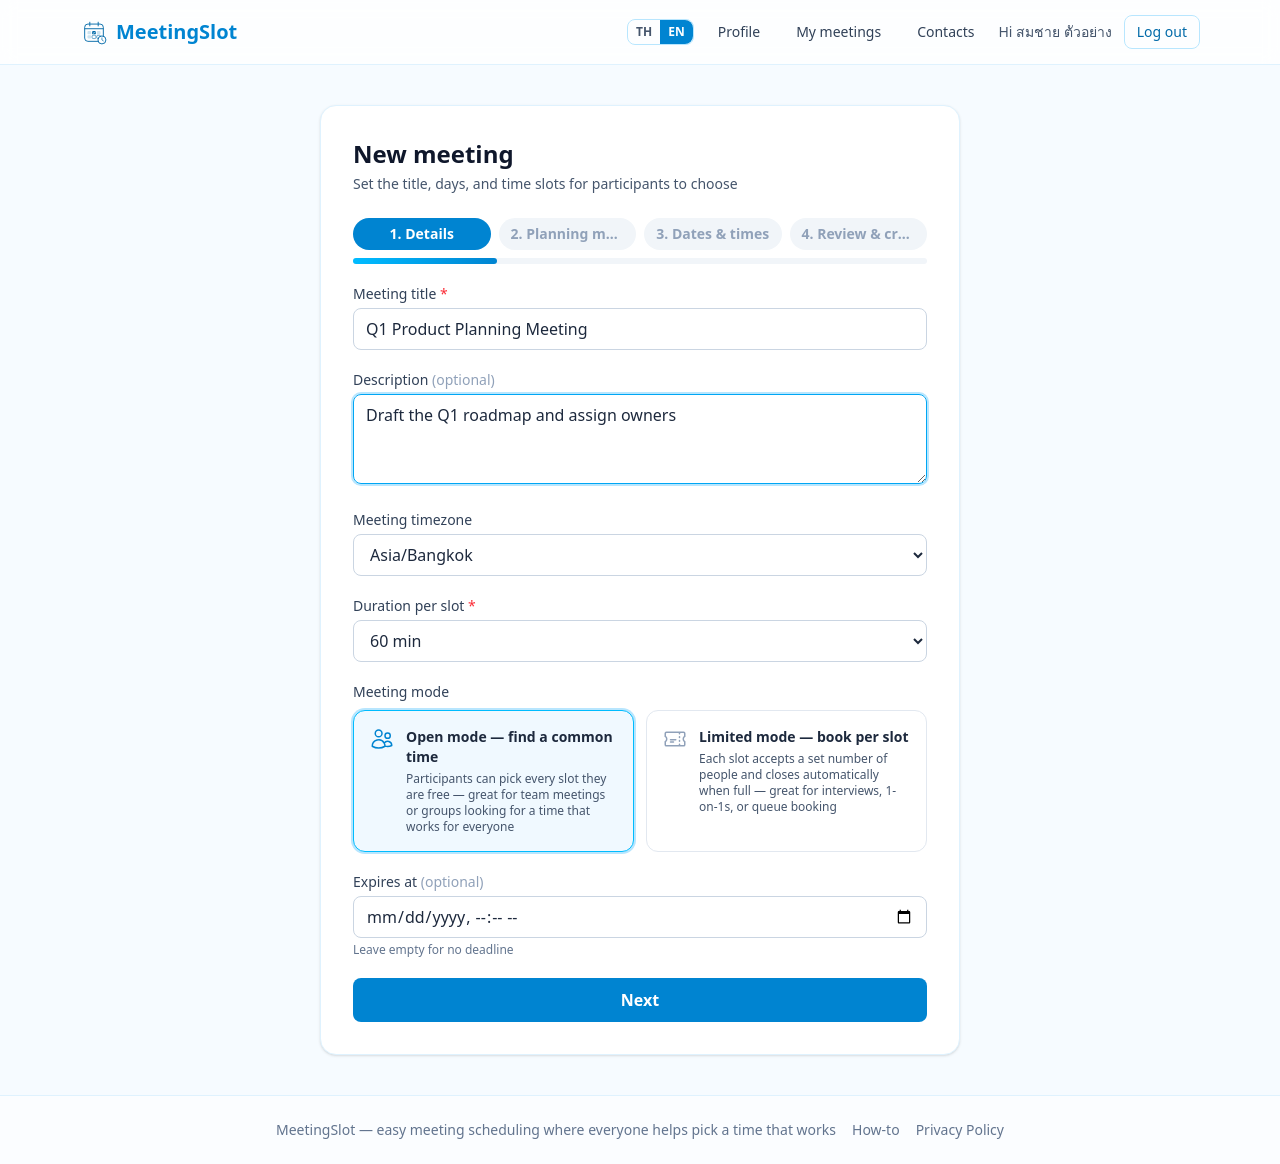
Step 1 — Details

  • Meeting title (required) — the name participants see in the invitation email, e.g. "Q1 planning meeting"
  • Description (optional) — a short summary of what the meeting is about, shown on the participant's scheduling page
  • Meeting timezone — all times refer to this timezone (default: Asia/Bangkok). Participants in other timezones get a button to switch to their own local time
  • Duration per slot (required) — how many minutes each slot lasts, e.g. 30/60 minutes. The system generates the slots from this value
  • Meeting mode — choose Regular mode — find a common time or Limited-capacity mode — book by slot
    • ⚠️ The mode cannot be changed later — it is set when the meeting is created. Decide before clicking Next.
  • Max slots per participant (limited-capacity mode only) — limits how many slots one participant can tick. Leave empty = unlimited (1–500)
  • Expires at (optional) — the date and time when choosing closes. Leave empty = no deadline
Step 1 details

Step 2 — How to set up times

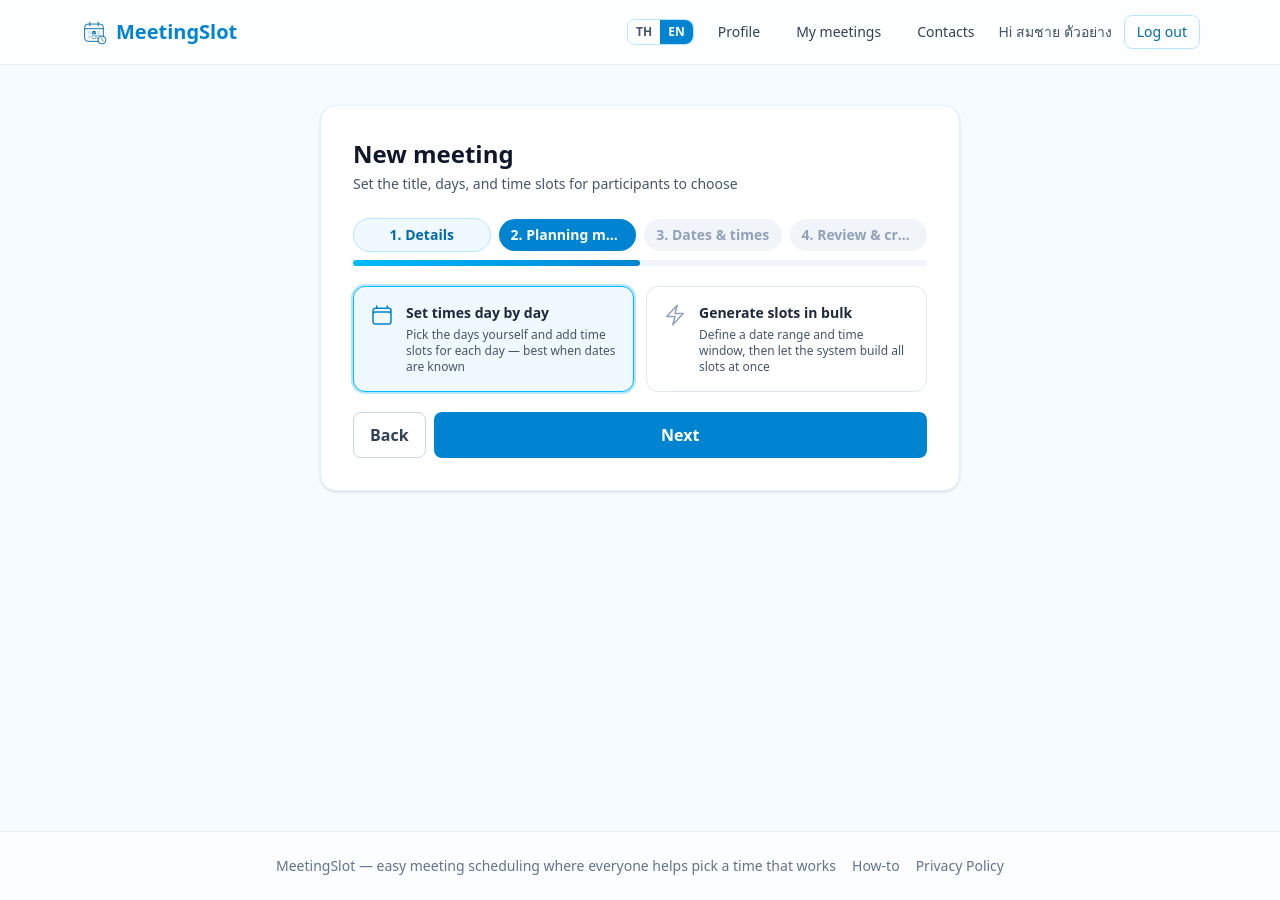
Choose how to create the time slots:

  • Set times manually, day by day — pick the days yourself and add time slots to each one. Best when your days and times are already clear
  • Auto-generate a batch of times — define a date range and a daily time window, and the system creates the whole batch of slots at once

You can switch between the two at any time — nothing you filled in gets lost.

Step 2 scheduling method

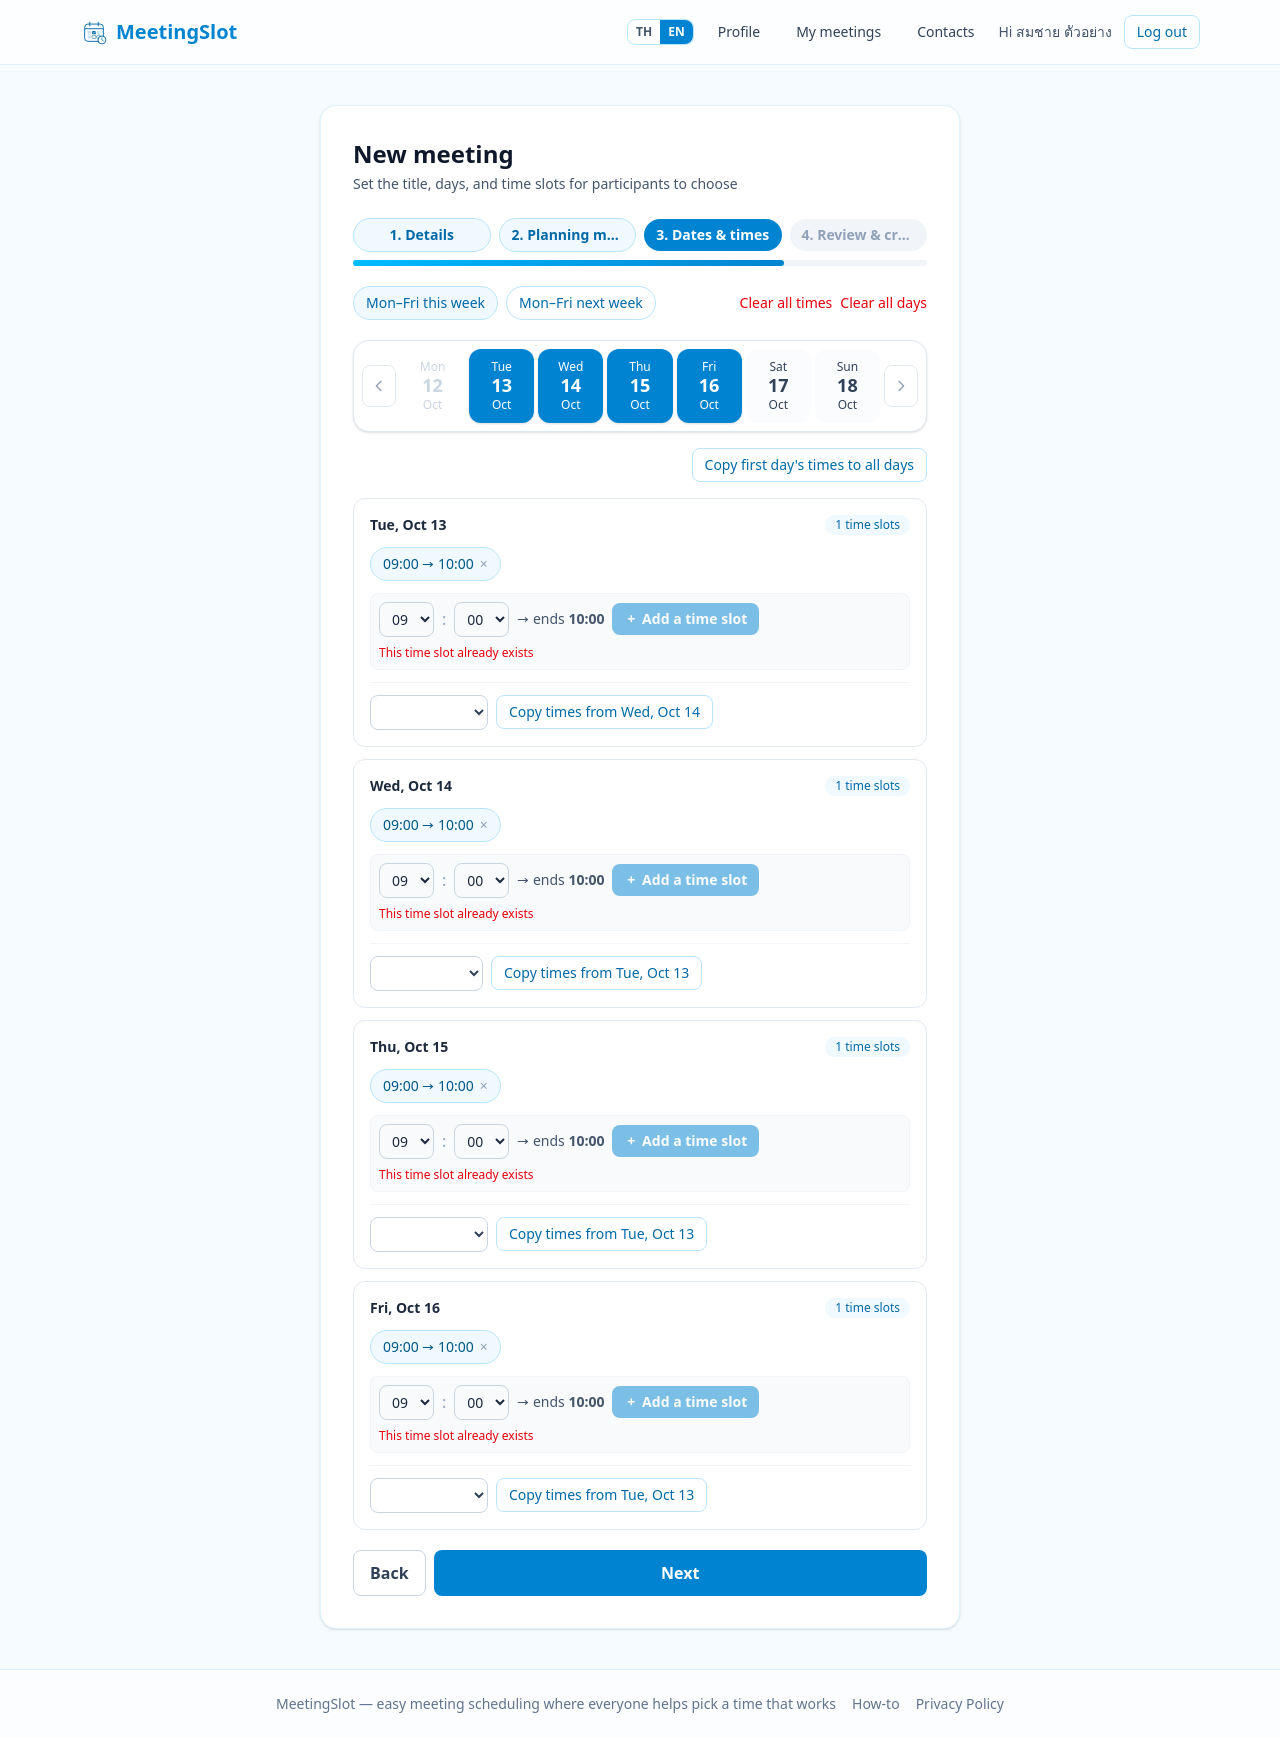
Step 3 — Days and times

If you chose "set times manually":

  1. Use the shortcuts Mon–Fri this week or Mon–Fri next week to add all working days, or click days on the calendar
  2. For each day, click Add a slot and set the start–end times (the end time is calculated from the duration per slot automatically)
  3. Use Copy the first day's times to all days or Copy times from (a date...) to save time
  4. In limited-capacity mode: also set the capacity for each slot (a slot without a capacity counts as incomplete, and you can't click Next)
  5. Use Clear all times (days stay, times are removed) or Clear all days (start over)

If you chose "auto-generate":

  1. Enter the from date / to date and pick the days of the week you want
  2. Enter the start time / end time and the gap between slots (minutes) — e.g. start 09:00, end 12:00 with a 60-minute gap = slots at 09:00, 10:00, 11:00
  3. The system shows a preview like "This will create N time slots" — click Add to list
  4. Generating a new batch replaces the previous generated batch (manually added slots stay) — up to 300 slots in total
Up to 300 time slots in total per meeting.
Step 3 days and times

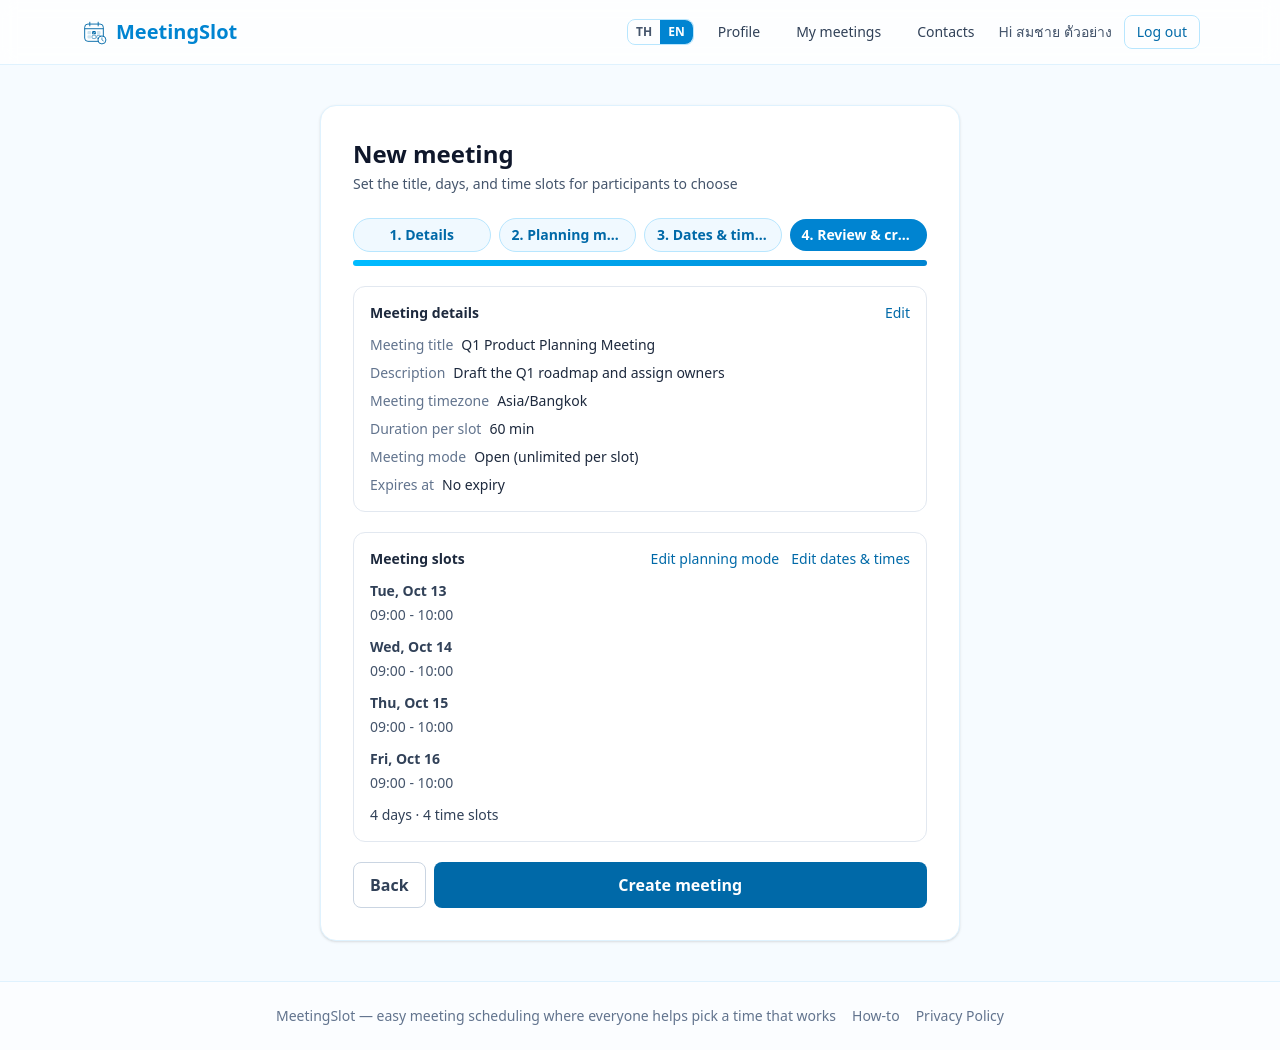
Step 4 — Review and create

Check the meeting details and all the time slots. Use Edit / Edit scheduling method / Edit days and times to jump back to any step, then click Create meeting.

You will be taken back to the My meetings page, ready to use.

Step 4 review

Inviting participants

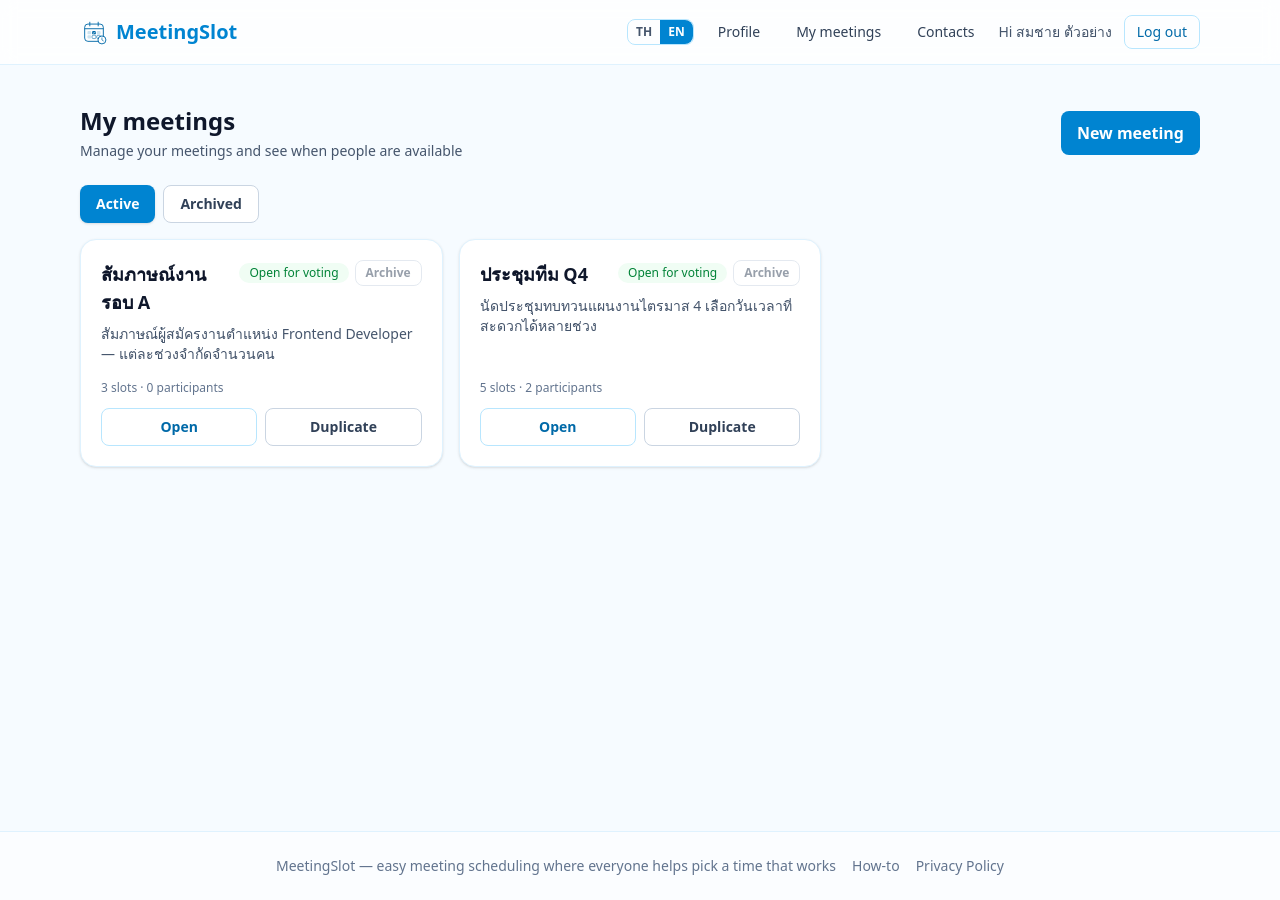
Meetings you create live on the My meetings page, showing the status (Open for voting / Locked / Expired / Finalized), the number of slots and participants, plus View, Duplicate buttons and the Active / Archived tabs at the top.

My meetings page

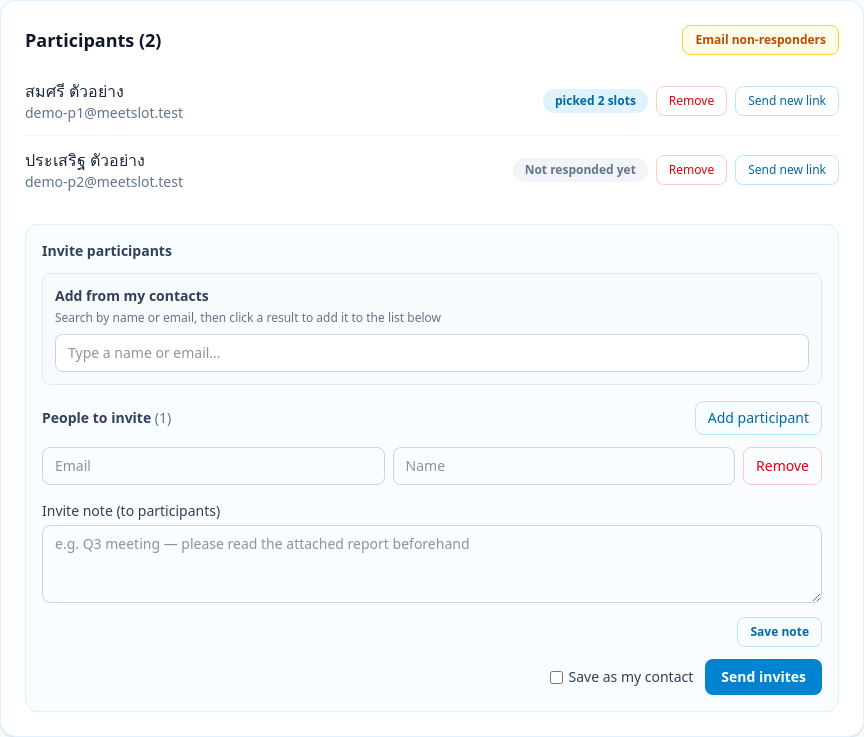
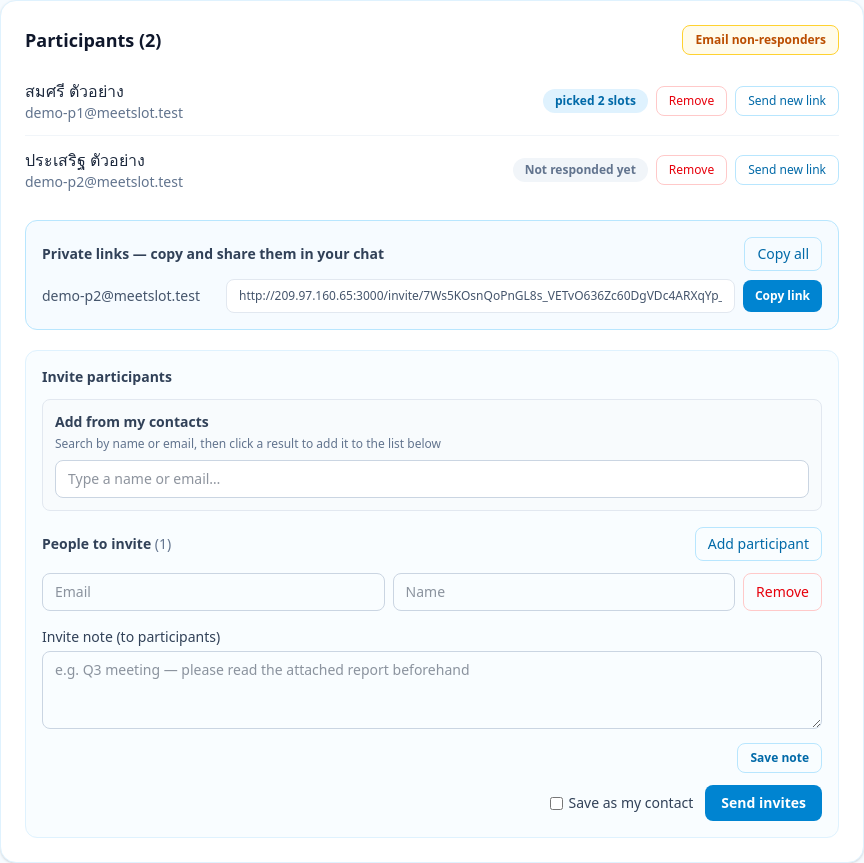
Click View to open the management page, then scroll down to the Invite participants card (visible while the meeting is not locked and not expired):

  1. Add from my contacts — type a name or email in the search box and click the matching person, or click a group button (e.g. "Marketing team (8)") to add the whole group in one click
  2. Under Participants to invite — click Add participant to add a row, then enter each person's email and name
  3. Message to participants (optional) — a note attached to every invitation email, e.g. a link to a document to read beforehand. Click Save note to keep it with this meeting
  4. Tick Save to my contacts if you want to reuse these people next time
  5. Click Send invites — the system emails each person a personal link
Participants on the management page

What is a personal link?

After sending, a box called Private links — copy and share them in your chat appears, showing each participant's unique link with a Copy link button (per person) and Copy all.

  • A personal link looks like `…/en/invite/{token}` — it *is* the participant's identity. Whoever has the link can go in and pick times as that person, so only send it through a secure channel and directly to the right person
  • The box is shown only once — the system never stores the raw link (only a hash, for security). Copy the links before leaving the page
If you closed the page without copying, don't panic — the links were already emailed to participants. If you really need a link again, use the Send new link button (see section 10).
Participants' personal links

What if an email fails to send?

If some invitations fail, the system removes those people from the batch automatically and shows a red banner listing which emails failed, with a Send again button — you can retry immediately without re-typing names or emails.

Scan/group share link

Besides personal links, there is a Scan/group share link card — click Generate link + QR to get a single link for scanning or sharing in a group chat. Participants enter their email to identify themselves, and the system checks that they are on the list before letting them in.

Anyone who knows a participant's email can enter as them — use this only if you accept that risk. Also, clicking Generate link + QR again instantly invalidates the previous link.

What participants see

Understanding what participants see helps you answer their questions.

Opening the invitation link — no sign-up

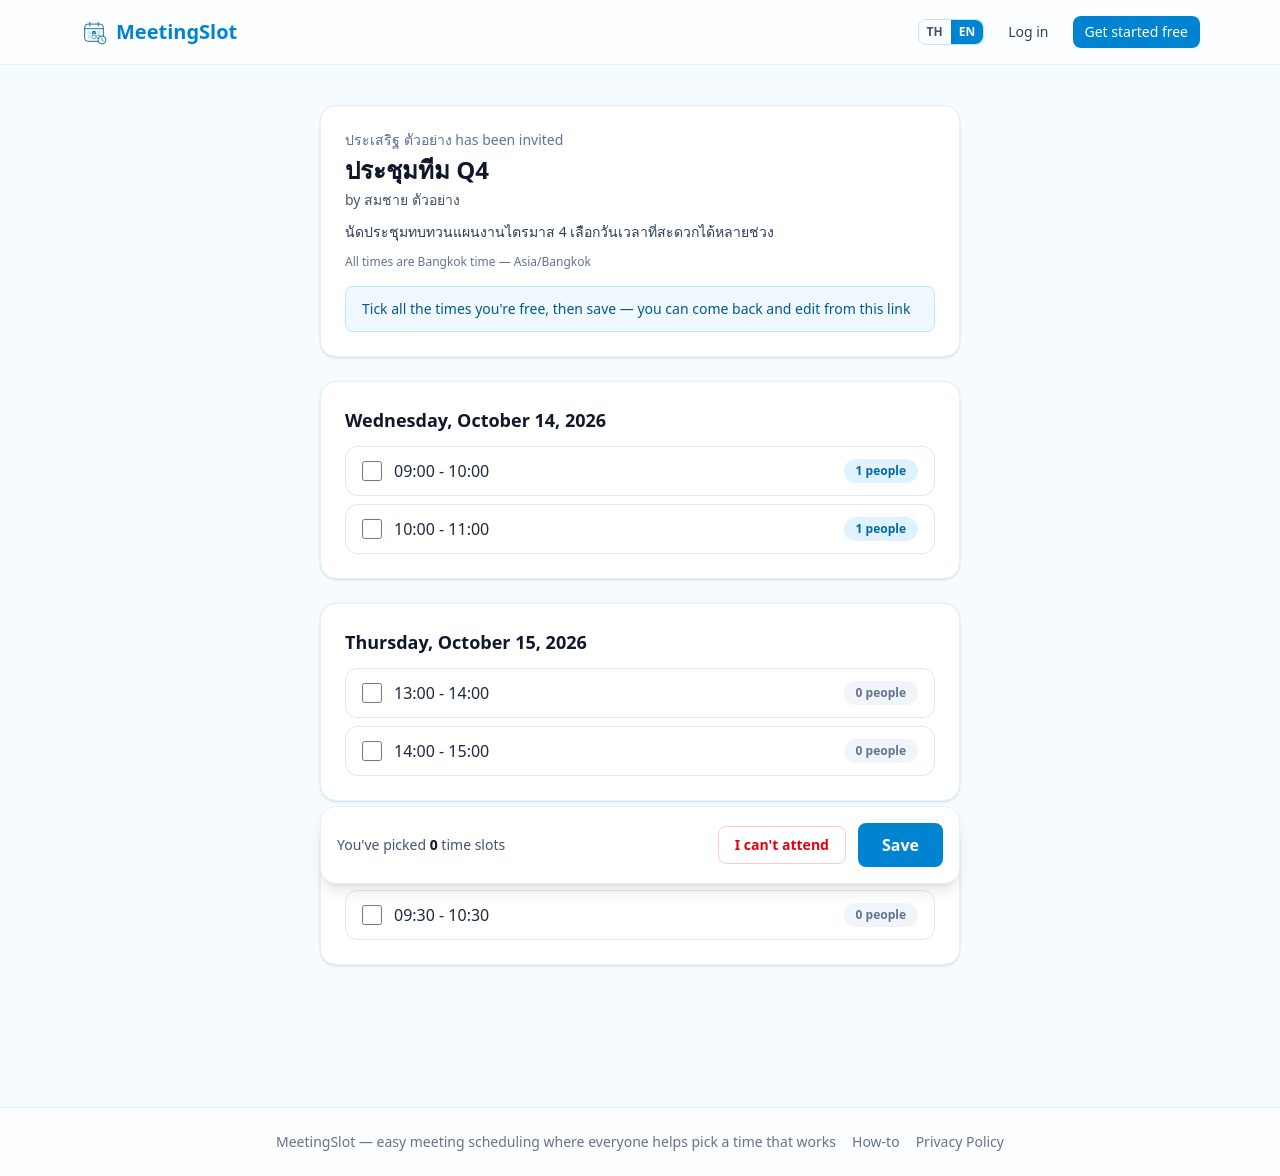
When a participant opens a personal link from the email, they see:

  • A "{name} has been invited" message, the meeting title, the organizer, and the description you wrote
  • "You can pick times until (date/time)" — if you set an expiry
  • All time slots grouped by day, each showing how many people picked it (limited-capacity mode shows "2/3 people"; full slots get a Full label and can't be ticked)
  • If the participant's timezone differs from the meeting's, a button to switch between meeting time and your time
Participant's scheduling page

Picking times and saving

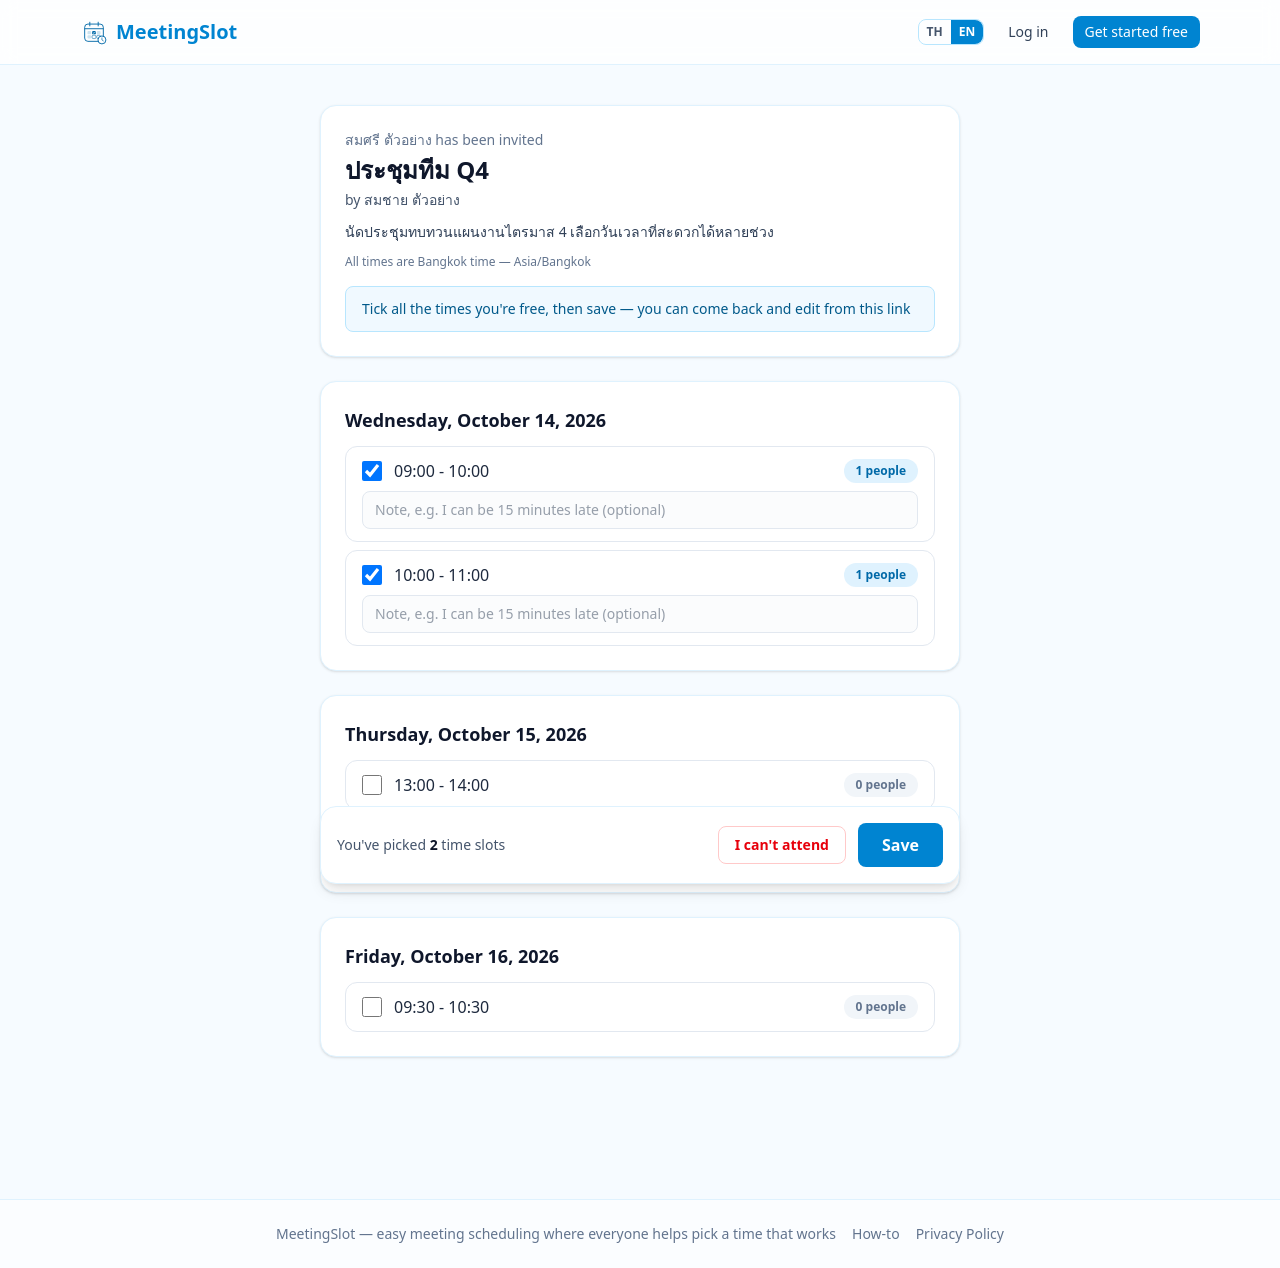
  1. Tick the boxes next to the slots you are free for — multiple slots are allowed (if the organizer set a cap, it shows "You can pick N more slots")
  2. Ticked slots get a note field, e.g. "can be 15 minutes late"
  3. Click Save — it shows "Saved — you picked N time slots"
Participant after picking times

What participants can and can't see

  • Can see: how many people picked each slot (total numbers)
  • Can't see: who picked which slot — votes are anonymous, so everyone can answer honestly
  • Editable: the same link can be reopened at any time to change picks and save again, until the expiry (if set) or until the organizer locks/confirms the meeting
  • There is an I can't attend button to opt out (existing picks are deleted) and a Rejoin button to come back, as long as the meeting is still open

After the organizer confirms the time

Participants see a green card Your round — the slot they picked that got confirmed, with the meeting link and any details the organizer attached, plus a list of all confirmed rounds (times only, no other people's names). A confirmation email with an .ics file is sent as well.

Reviewing votes and confirming the time

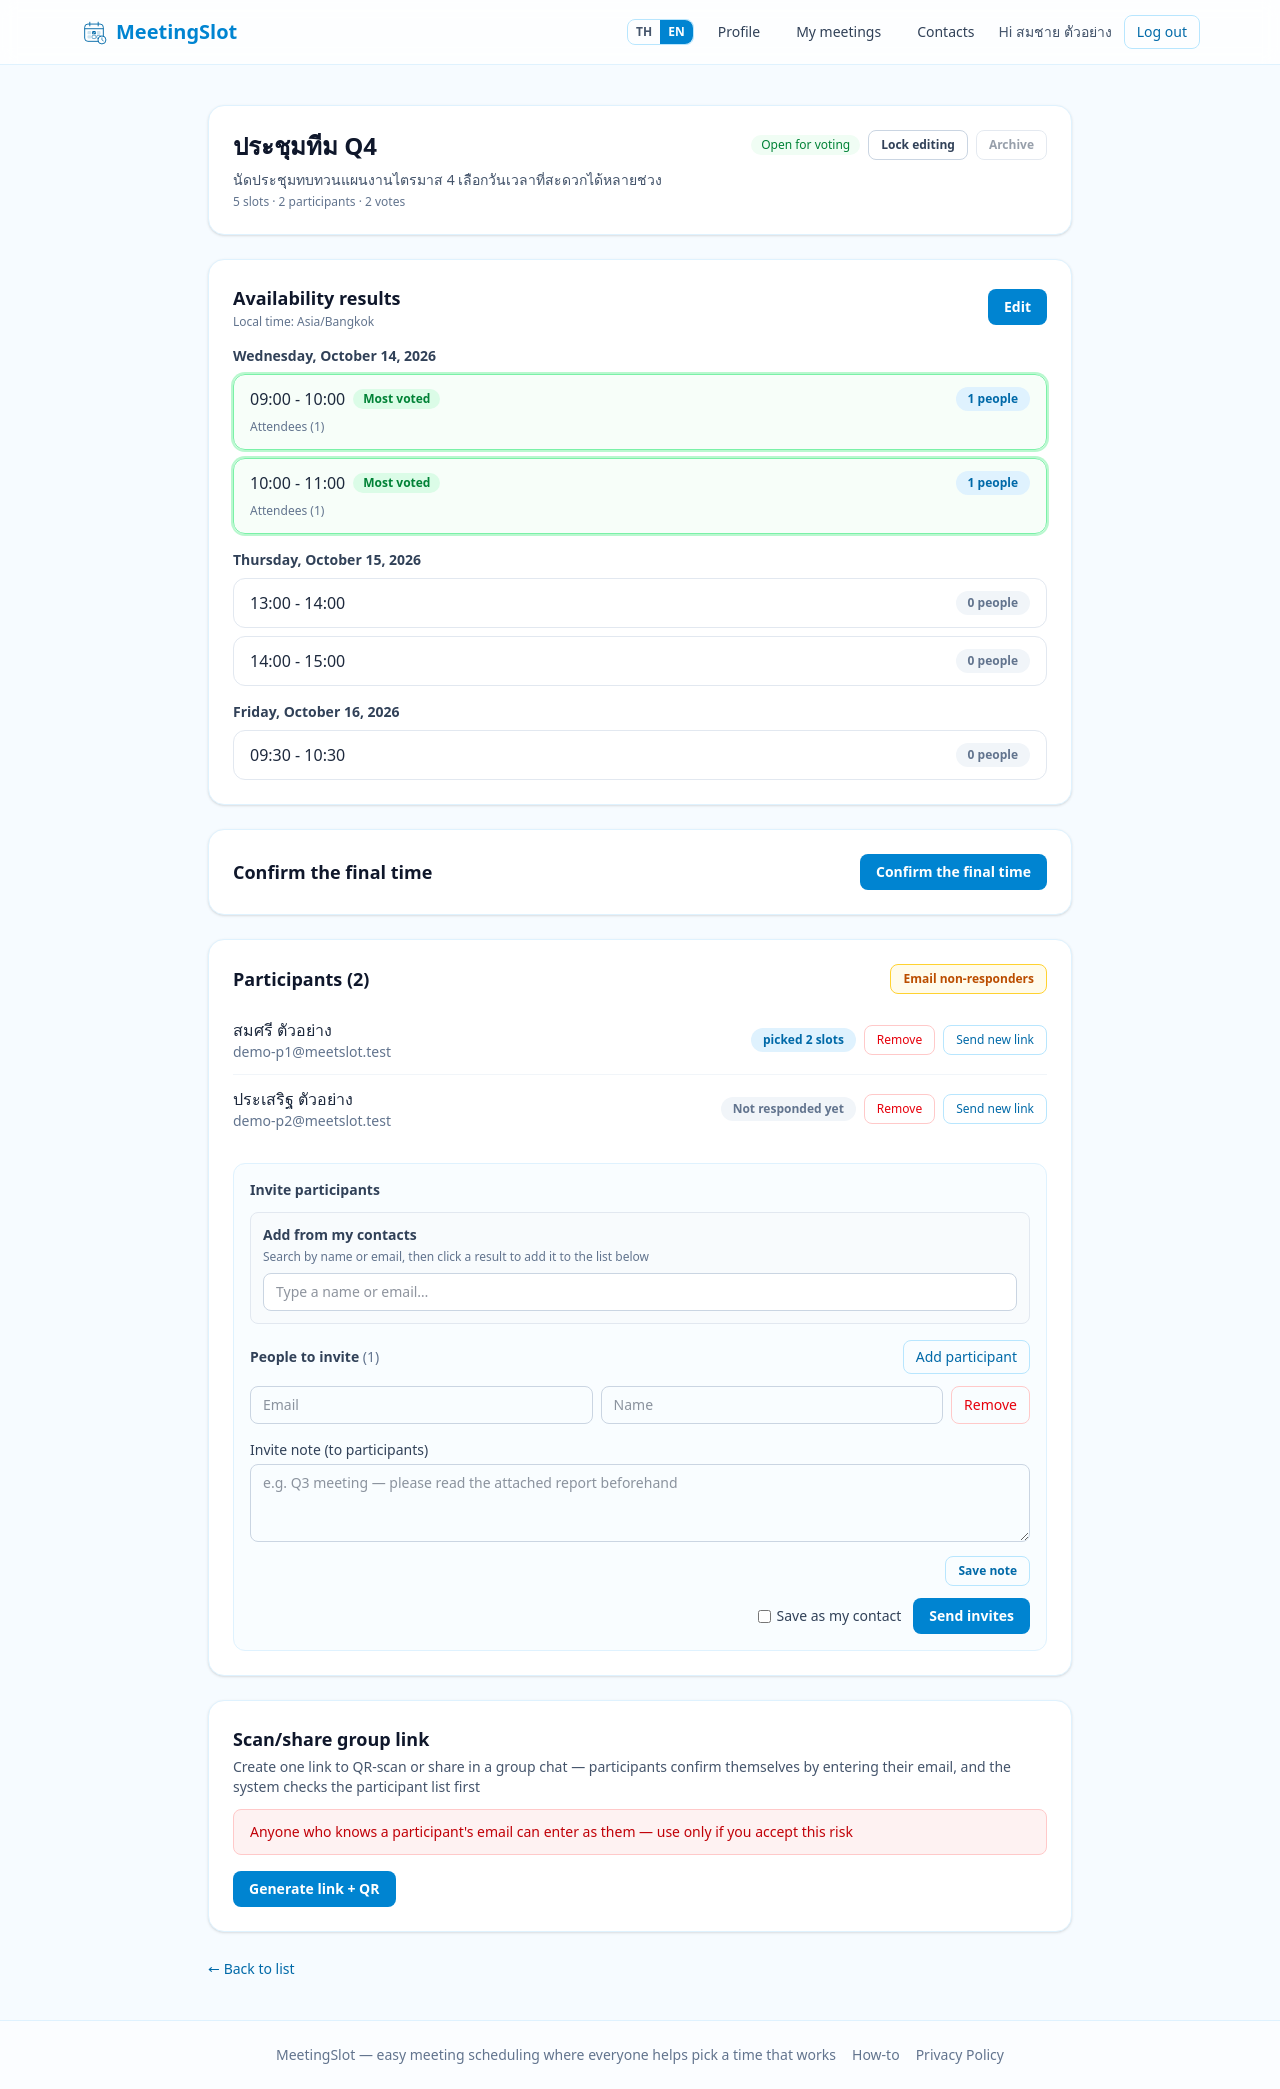
On the management page, the Voting results card shows every time slot grouped by day:

  • The most popular slot gets a green Most voted label
  • The number of people per slot shows as a badge — in limited-capacity mode it shows "X/Y people" (picked/limit)
  • Click Attendees (n) to see who picked that slot (visible only to you as the organizer)
  • Notes participants wrote appear with their names under the slot
  • All times are shown in the meeting timezone
Voting results

Confirming the time (Finalize)

On the Confirm the final time card, click Confirm the final time, then:

  1. Pick the slot(s) — in regular mode choose from a dropdown, one slot only / in limited-capacity mode tick multiple rounds at once (only slots that already have picks are shown)
  2. Meeting link (optional) — e.g. a Google Meet link, attached to the confirmation email
  3. Details for participants — the agenda, documents to read, etc.
  4. Click Confirm & send email

What happens next:

  • The system sends confirmation emails with an .ics file (a calendar file that opens in Google Calendar / Outlook) — each participant receives only the rounds they picked and that got confirmed
  • The meeting is locked automatically — participants can no longer change their times (status shows Finalized)
  • To change the confirmed set, click Send again in the green banner and pick again (the new email is sent to all participants of every round again)
Regular mode confirms exactly one slot — confirming multiple rounds is a limited-capacity mode feature.

Editing a meeting / days and times

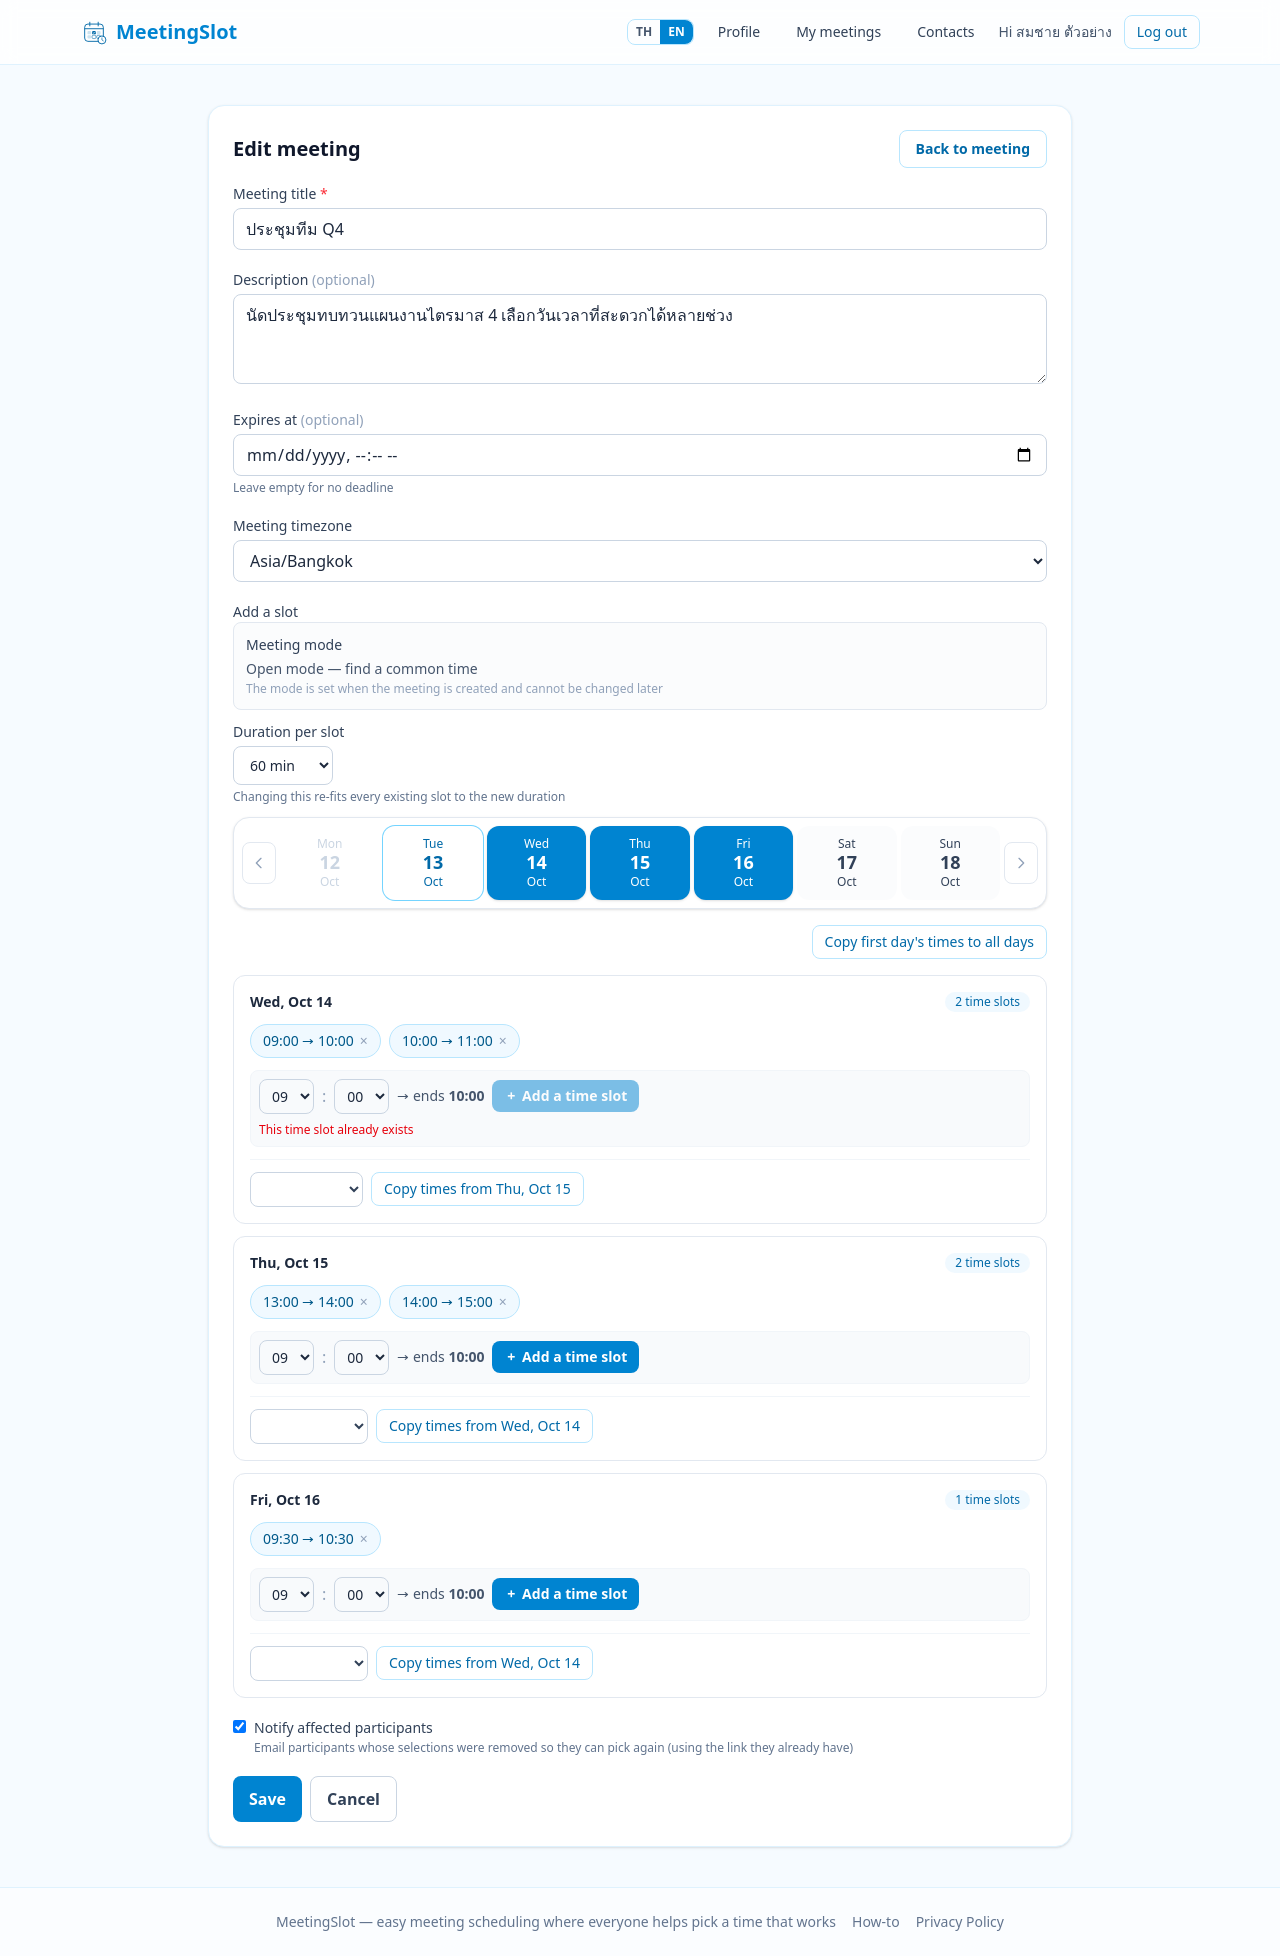
On the management page, click Edit (on the voting results card) to open the Edit meeting page. You can change:

  • Meeting title, description, expiry, meeting timezone
  • Add/remove/edit time slots (same methods as when creating)
  • Duration per slot — changing it re-spaces all existing slots based on the new duration
  • Limited-capacity mode: max slots per participant can be changed too
Important limitations
  • The meeting mode cannot be changed (set at creation)
  • Editing is only possible while the meeting is not locked and not expired — if locked you'll see "Locked — unlock before editing"; once expired, editing is disabled entirely
  • Changing the timezone clears everyone's picks and the system emails all participants about it — only do this when truly necessary

Before clicking Save, there is a Notify affected participants option (ticked by default) — it emails participants whose picks were removed so they can come back and pick new times.

Effect on existing votes: votes in slots that still exist stay as they are; votes in removed slots disappear together with the slot (the save page reports how many votes were removed).

Edit meeting

Participant management tools

On the management page you have these tools:

ToolWhat it doesGood to know
Email non-respondersEmails a reminder only to people who haven't picked any time yetThe reminded person's old link stops working — the system replaces it with a new link inside the reminder email
Send new link (per person)Creates a new link for that participant, e.g. the old email got lost or the link leakedThe old link stops working immediately — the new link is shown for you to copy and forward, and the system emails it to the participant too
Remove (per person)Takes the participant out of the meetingTheir votes and notes are deleted too, and the old link stops working immediately
Lock / UnlockStops/allows editing for all participantsUse it to freeze the schedule. Confirming the time locks the meeting automatically
Archive / RestoreHides finished meetings from the main list (they move to the Archived tab)Restorable at any time — data and links keep working as usual

Archiving rules: a meeting can be archived only when it is locked or expired — open meetings can't be archived. The system always asks for confirmation first: "Archive this meeting …? It will be hidden from the main list, but data and links keep working."

Besides the reminders you send yourself, the system also emails participants automatically before the meeting expires.

My contacts

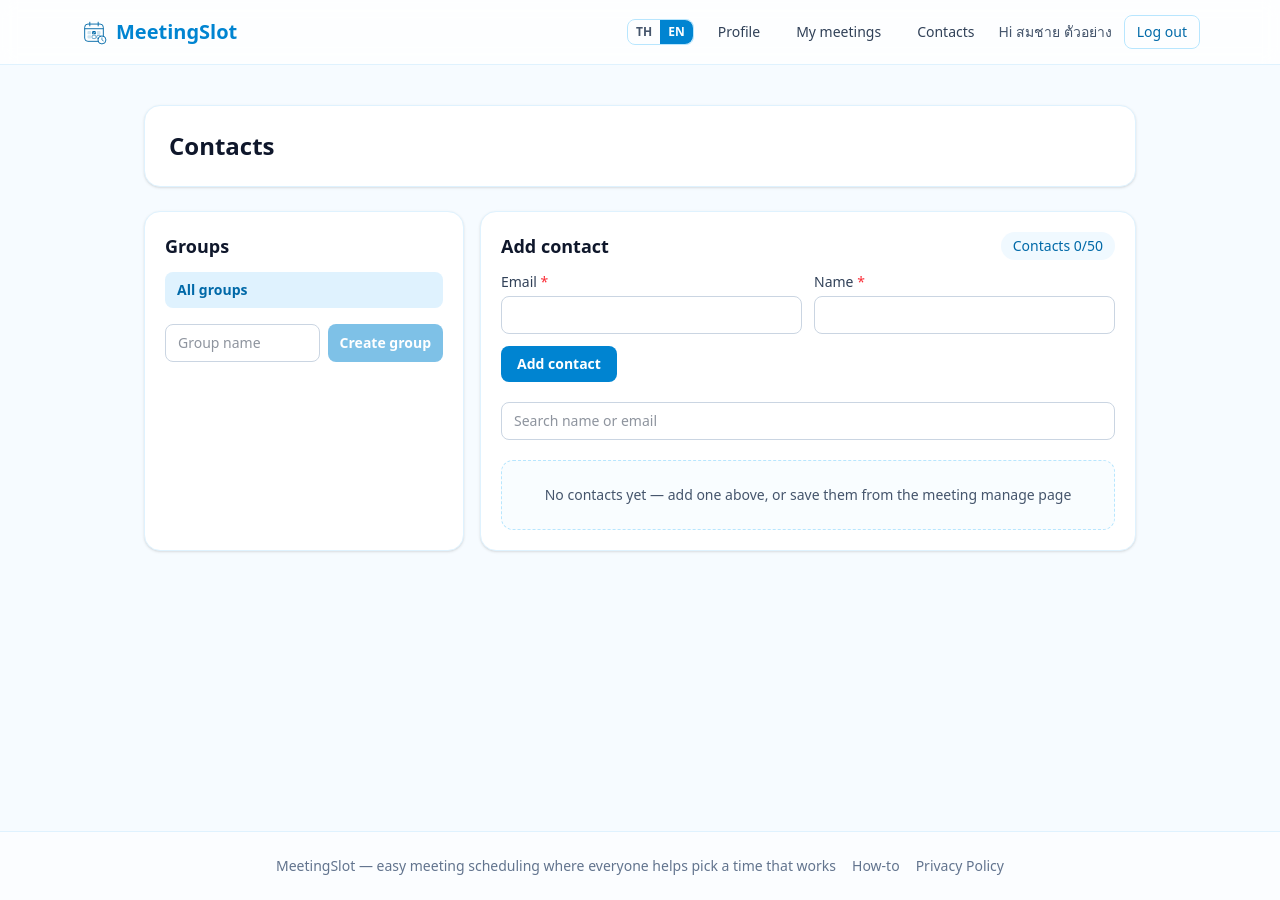
The Contacts page (in the top menu) stores the people you invite often, for reuse.

  • Add a contact: enter the email and name, pick groups (multiple allowed), and click Add contact (up to 50 contacts)
  • Contact groups: type a group name and click Create group, e.g. "Marketing team", "Board members" — groups filter the list on the right and become one-click add buttons when inviting on the management page
  • Search with the Search name or email box; select several rows and use Delete selected

Using contacts when creating a meeting: in the invite card, click Add from my contacts, type to search and click, or click a group button to add everyone in one click. Alternatively tick Save to my contacts when sending invitations — the system saves the people you just invited for you.

Contacts page

Profile and account deletion

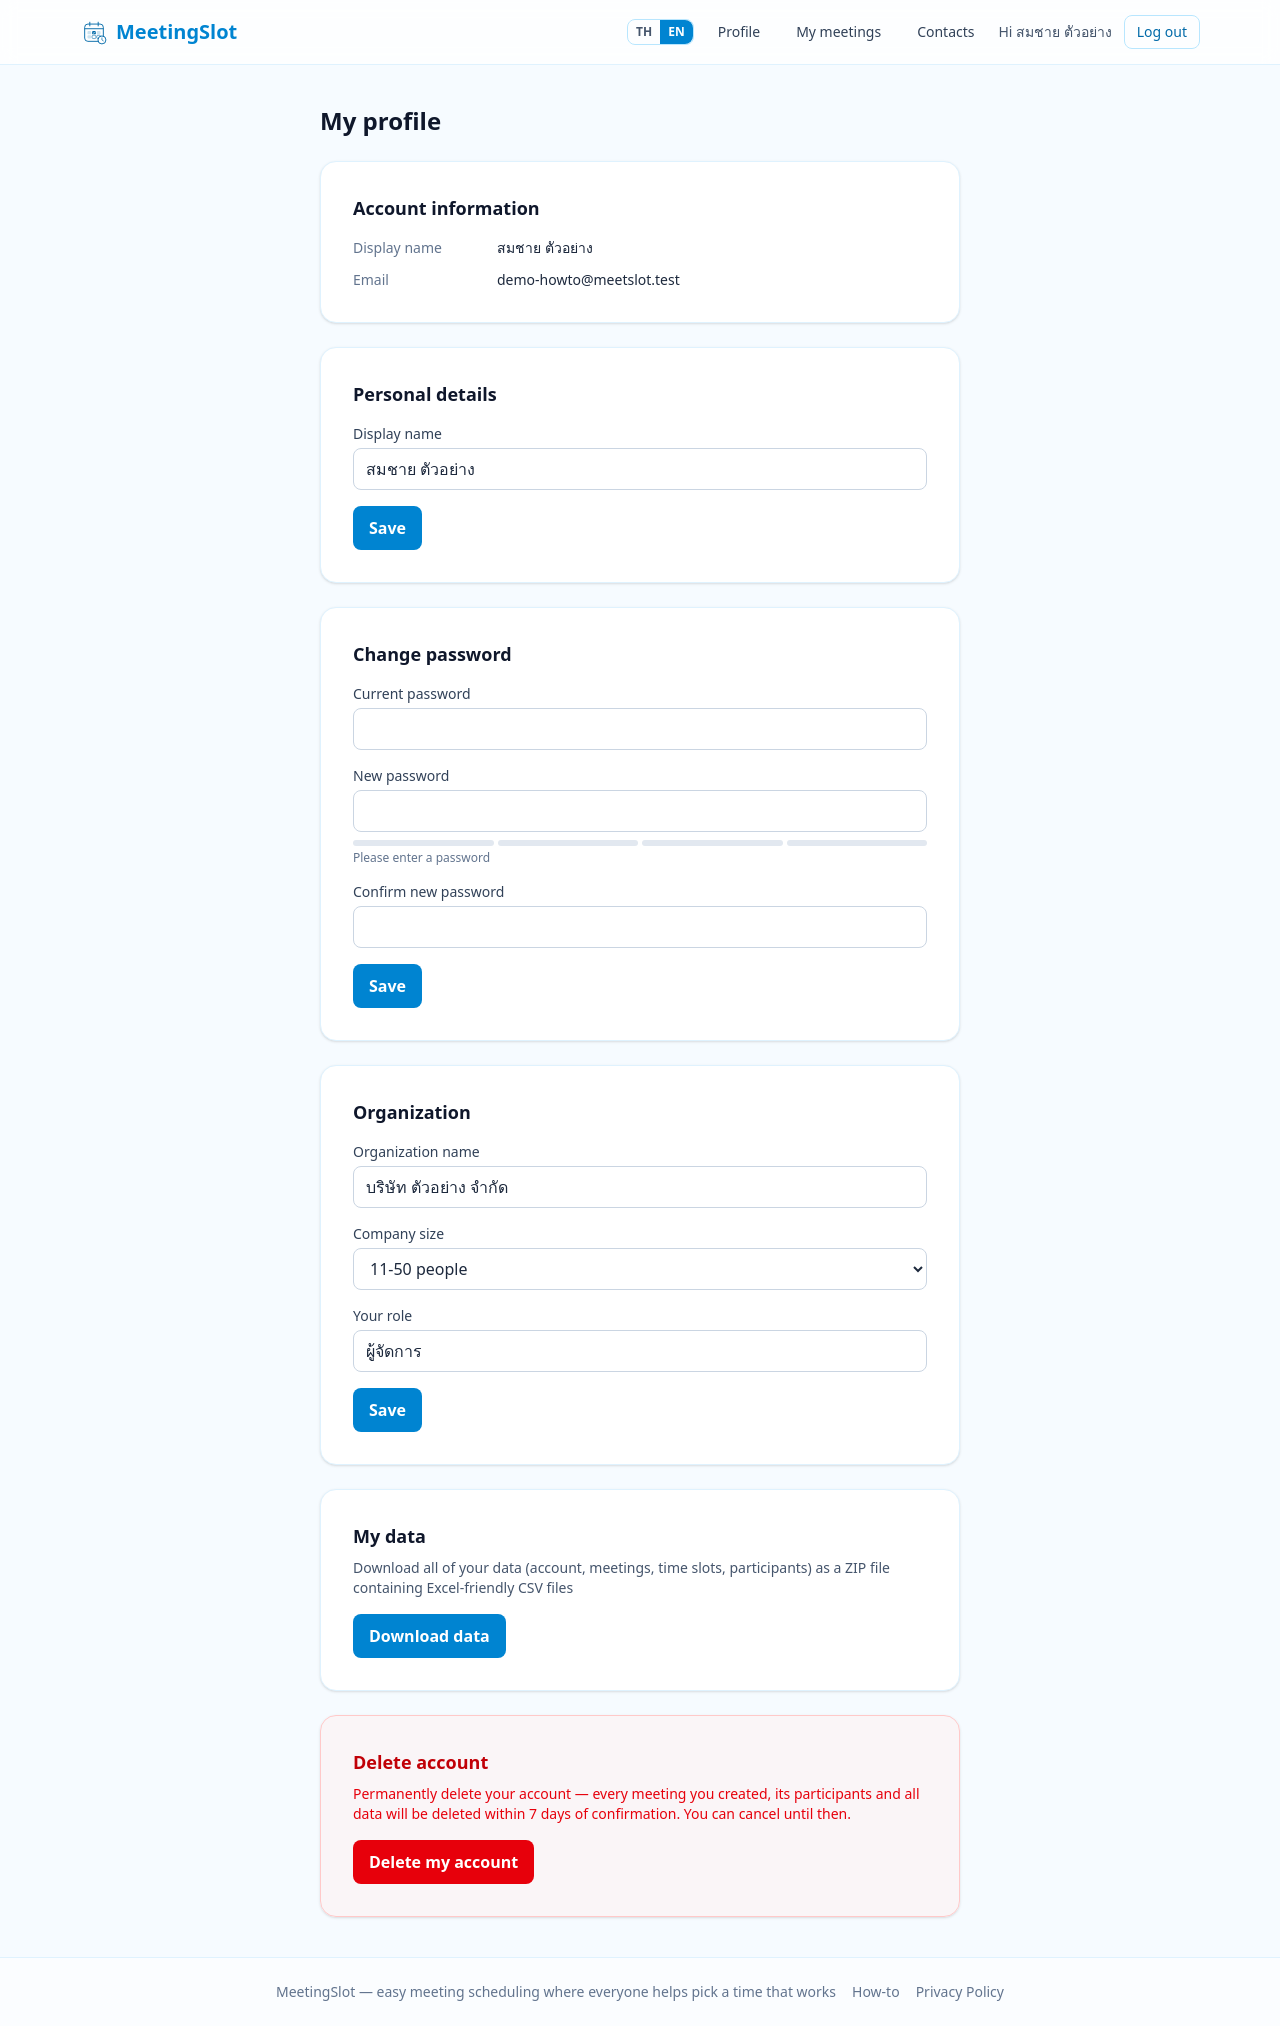
The Profile page gathers all account management in one place:

  • Account details — see your display name and email
  • Personal details — change your display name and click Save
  • Change password — enter your current password, the new password, and confirm it (Google accounts have no password to change) — changing it signs out your other devices
  • Organization details — organization name, size, and your role can be updated later
  • My data — click Download data to get a ZIP with CSV files that open in Excel (account, meetings, slots, participants)
  • Delete account — click Delete my account; the system schedules a full data deletion within 7 days. During that window, click Cancel account deletion to restore everything
Profile page

Frequently asked questions (FAQ)

I lost a participant's invitation link — what do I do?
Personal links are shown only once for security. Go to the meeting's management page and click Send new link next to that participant's name — the system emails them a new link, and the old one stops working immediately.
A participant says the invitation email never arrived?
If a red banner appeared when sending, click Send again on that banner (the list stays intact — no re-typing). If the email went out but can't be found, ask the participant to check their spam folder, or copy the link from the Private links box and send it via chat instead.
Do participants need to sign up?
No — opening the invitation link is enough to pick times. Only the *organizer* needs an account with a verified email.
Until when can a meeting be edited?
The organizer can edit as long as the meeting is not locked and not expired. Participants can change their own times until the expiry (if set) or until the organizer locks / confirms the meeting.
I forgot my password — what do I do?
There is no "forgot password" page yet — if you are still logged in, change it under Profile → Change password. If you can't log in at all, contact the system administrator for help (Google login accounts have no password to forget — just click Sign in with Google).
I signed up but didn't receive the verification email?
Check your spam folder first — if it's not there, log in with the email and password you signed up with and click Send the verification link again on the login page. If the system failed to send the email, your account was still created (the sign-up page tells you right away), so you can log in as usual.
I signed up but still can't create a meeting?
You need to verify your email and complete your organization details first — if anything is missing, the create-meeting page shows a notice with a button to the organization details page.
Can I switch the meeting mode (regular ↔ limited capacity) after creating it?
No — the mode is fixed when the meeting is created. If you really need a different mode, use the Duplicate button on My meetings to copy the meeting and set it up again with the mode you want.
I confirmed the time but changed my mind — can I redo it?
Yes — click Send again in the green "meeting time confirmed" banner to pick a new set of slots. A new confirmation email (with .ics) goes out to all participants of every round again.
Can I keep participants for the next round?
Yes, two ways — tick Save to my contacts when sending invitations, or add them yourself on the Contacts page (grouped, so you can invite a whole group in one click).
Glossary

TermMeaning
OrganizerThe meeting owner — the person who signs up, creates the meeting, invites participants, and confirms the time
ParticipantSomeone who receives an invitation link and picks times without needing an account
Slot (time slot)One period of time the organizer opens for picking, e.g. Oct 14, 09:00–10:00
Invitation / personal linkEach participant's unique link for picking or editing times — the system doesn't store it, so it is shown only once
VoteA participant ticking a time slot. One person can pick multiple slots and edit until the deadline
CapacityThe maximum number of people a slot accepts (limited-capacity mode only). When full, the system closes the slot automatically
LockA state where participants can't edit — the organizer can lock manually, or it happens automatically when the time is confirmed
Confirm (Finalize)When the organizer picks the final slot(s) (regular mode: 1 slot / limited-capacity: multiple rounds) — the system emails everyone an .ics file and locks the meeting automatically
.icsThe standard calendar file that opens in Google Calendar / Outlook — attached to confirmation emails
ArchiveHiding a finished meeting (locked or expired) from the main list — data is kept and it can be restored at any time